
Preschool Room Tour
A few weeks back I was having an Instagram conversation with someone about the space we use to do all our preschool crafts and activities. If you follow me on Instagram, or have read some of our Play Through The Bible posts, you might have noticed some of what we’ve done with the room. Because of this conversation, I decided to do a little room tour!
I was hoping to be able to have a designated room for all our crafts, sensory materials, and preschool activities, but when we moved here that was unfortunately not a possibility. We ended up putting pretty much everything in our dining room. Using a very limited budget and a little bit of creativity, we ended up with something that might not be the prettiest, but is functional and able to adjust as needed. Check it out!
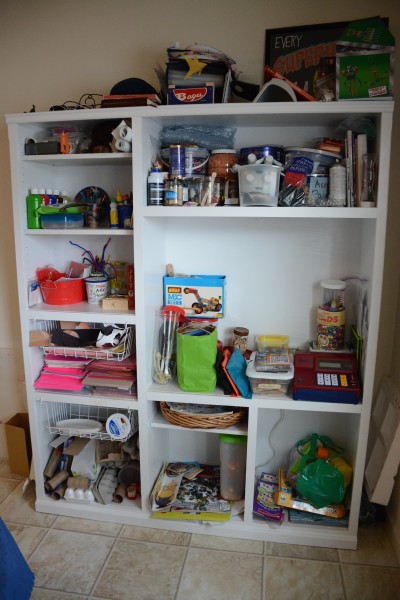
Although I was tempted to give it a little of a face-lift before taking this picture, I decided to leave our shelf in its “real life” state. I like to call it ordered chaos. 🙂
Originally we bought this old entertainment center second hand on the cheap at a Habitat for Humanity Restore. We painted it a discounted off white and used it in our bedroom to store baby things when K was born and we were all sharing one room. After spending a year in storage it needed another facelift before we brought it into our new place. So, we painted it a bright white and it found a new home in the dining room.
This shelf (creatively named “the white shelf”) houses all K’s craft supplies, sensory materials, and a lot of his learning toys and activities. The top tends to house random things that need to be out of reach. Right now it is holding my camera, Bible and journal, K’s Old Testament Play Through The Bible crafts, my laminator, some Legos and K’nex that are a little difficult for K to use, and the sign we used to announce our pregnancy.
On the left side from top to bottom we have:
1) random things that need to be out of K’s reach
2) paints, markers, scissors and other things that should be out of K’s reach but he figured out how to get to with a chair in about 2 seconds
3) random craft supplies
4) paper (scrap paper in basket)
5) recyclables for crafts (paper plates in basket)
The big spot in the middle is learning toys and activities. Underneath to the right is coloring books and stickers and to the left is more learning games and toys.
Our rule with the “white shelf” is that K has to ask before he gets something off and he is only allowed one thing at a time. So far this method has worked pretty good. It keeps the mess in check, but still allows him freedom to creatively and independently use the materials.
The goal is to eventually have the hubby add a few more shelves in order to keep things more organized, but we always have a foot long list of projects and that one isn’t ranked at the top as of now. Someday it would be nice to have cute matching baskets and the like, but for now random containers will have to work!
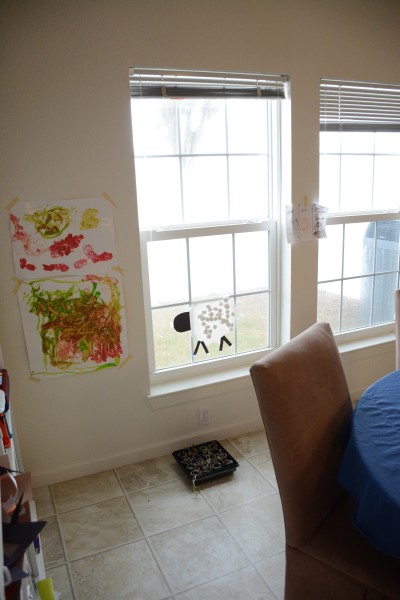
Moving around the room, we have our lovely windows with sun actually coming through. There is a tree in our backyard that makes it very difficult to get good lighting in this room, so I snapped these pics quick while I had the chance.
I try to hang as much of K’s work as I can, especially things he worked hard on, so here you’ll see some paintings and other projects hanging up. (Sheep was made here.) On the floor are the seeds we started here. I ended up killing off about half of them – whoops!
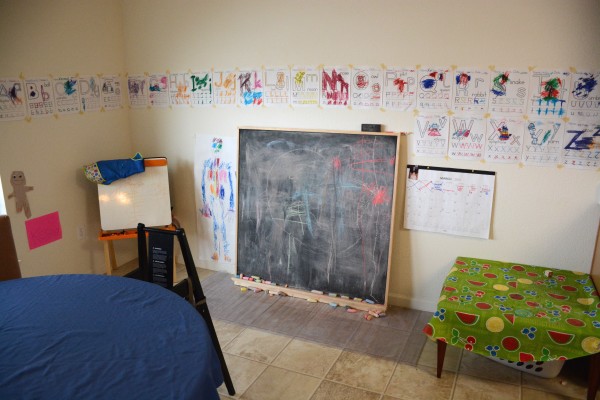
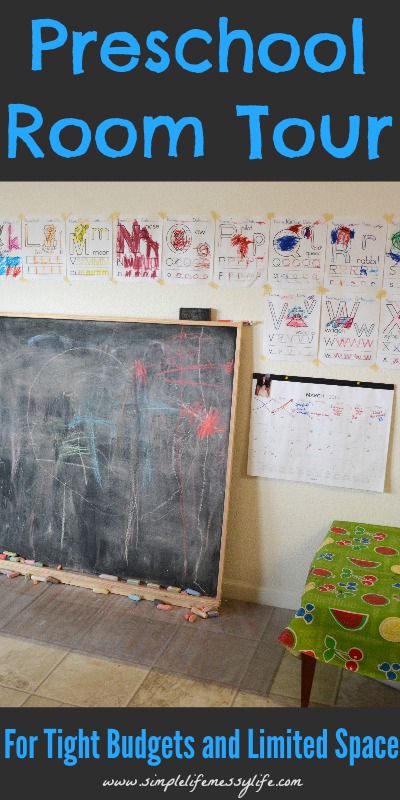
If you keep going around the room (you can see our hand-me-down dining room table in the middle), you will find the main activity area. There’s more projects hanging on the wall: the alphabet K worked so hard on, the little man that he made all by himself, and his life-size skeleton he colored due to his obsession with bones.
On the left is an easel I found at a thrift store for less that $15. We use pretty much exclusively dry erase crayons on this. I had never heard of them before I bought the easel, but they are amazing!
In the middle is the giant chalkboard that my super handy hubby made. Originally it was going to go in K’s bedroom, but it found it’s way here and ended up being perfect for the space!
Next to the chalkboard is hanging a large, cheap calendar. I made a countdown calendar for K at Christmas time and he loved it, so I bought him a real calendar and we’ve been using it since. We don’t we anything “official” with it everyday, but he crosses the days off as they pass and I try to add events to the calendar that are of interest to him. It has really helped with his numbers and counting and he is slowly starting to understand the days of the week, what a month is, etc.
On the right is an old square coffee table that we didn’t have a use for. I shoved it in the corner and put a cheap plastic tablecloth over it. It works great as a work space for K.
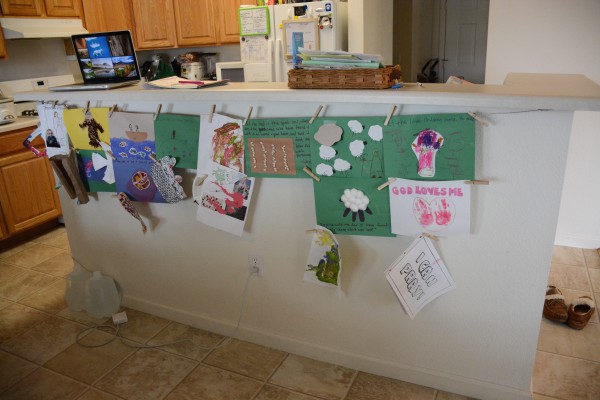
One more turn around the room and you come to the island that is shared with the kitchen. Here we have a simple craft display that my personal handyman set up. It’s just a wire screwed into the countertop. So far, we’ve used this area to display K’s Play Through The Bible crafts. It has worked great to be able to go back and reference what he’s learned.
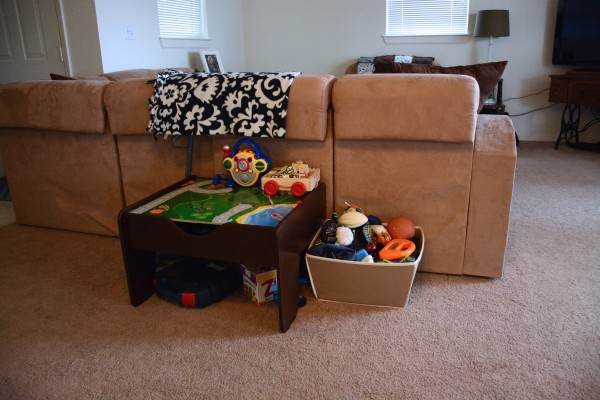
These next two pictures are a little bonus. 🙂 If you take a step out into the living area, you will find K’s small toy area. We try to keep most of his things in his room, but downstairs he has his Lego table (thrifted!) and a small bin of toys.
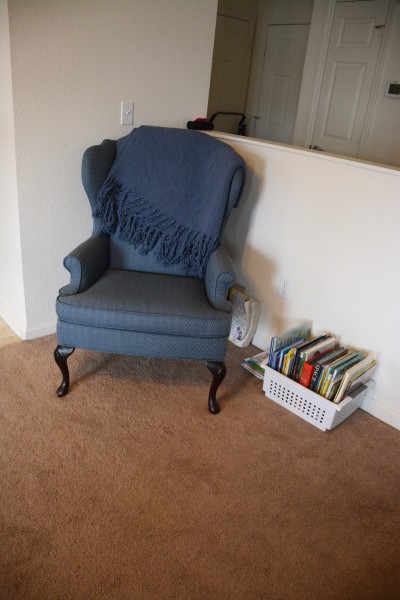
Finally, if you turn to the left, you’ll see the reading nook. A comfy (hand-me-down!) chair and a basket stuffed overflowing with library books. When we do reading lessons, this is where we sit as well.
Well, I hope you liked this little tour! I don’t do many of these types of “real-life” posts, but I always enjoy reading them on other blogs. It is fun to see what different people do! I do share a lot of these types of things on Instagram though, so I’d love to interact with you there!
This post is linked up with…
Affiliate links included. Thank you for using your purchases to support Simple Life. Messy Life.
This looks like a fab place to play. Thank you for linking up at #Fabulously Frugal with your great post.
[…] 1. picture tile coasters 2. DIY Teacup planters 3. pre school room tour […]
[…] a lot of fun “nature centers” set up in people’s homeschool area, but I knew our preschool room didn’t have enough space for something like that. Then, inspiration […]